Showing posts with label projects. Show all posts

Saturday, 24 July 2010

Connecting parents and kids through gardening

Last week I visited my friend's community garden plot with my 2 year old daughter. My friend also has a 2 year old - in fact we met in our mums and bubs group!

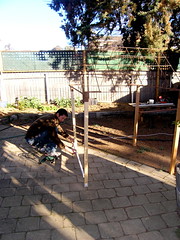
IMG_1644The plot is great and my friend is just getting started; mulching, composting and planting some winter broad beans and peas. Her son is also helping out and has his own little section of the plot. As we planted and raked, we talked about meeting others at the community garden and the space itself having lots of potential to set up small groups and workshops - especially a kids space!
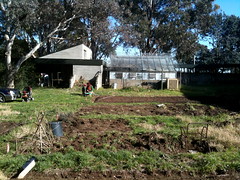
IMG_1645We asked ourselves, what about a community garden playgroup to bring kids and parents together? There's such a thing elsewhere, like Macedon for example,

Some of us have small children who now, after three years of going to ‘veggie club’, know each other and really look forward to gardening. My four year old is so keen if I mention I am going to do some gardening he gets very excited.
Also, the Braybrook Community Gardens and Playgroup Victoria run a permaculture set up too, which looks awesome!

I did a bit of a search for such things around Canberra but so far, I can't find anything online. Is there such a thing? Does anyone know of a community garden space that playgroups may use or parent groups use as a meeting place? We'd love to hear about your set up if so!

There's been some great moves in setting up kitchen gardens as part of the curriculum in primary schools - Stephanie Alexander's program is very popular, for example. But what of younger kids and their parents?

Wouldn't it be great to hook in to both a parents group AND a shared gardening experience?
Designing a vertical garden for small spaces

I want to try out some vertical garden techniques in our backyard, to make more use of some of the precious sunny spots, especially behind our garage (the back of which faces north). So far, we have really only made use of trellises for peas and beans and corn stalks to support beans and the like - but there is certainly more we can do!

Some of the resources I've found so far make use of trellises, which is a great idea, but I'm kind of looking for something that's more like the vertical garden wall concept that will suit non-climbing plants too.

Here's what I had in mind:

1. Fill a hessian bag with composted soil and water crystals.
2. Stake the bag through the middle and also wrap with chicken wire to give the bag itself some structure and longevity.
3. Stand the bag next to the shed wall and sceure witht he stake and some wire ties (this should stop it tumbling into the garden bed itself).
4. Soak the bag through ready for planting!

This part of our garden is very narrow so the idea of growing "up" means we can hopefully produce more in the small space. The one concern is the amount of reflective heat from the garage wall (being metal), but I'm hoping that the soil/compost filled bag will act as its own insulation to a degree.

It's an experiment, so we'll see how we go! For now, here's another system you could try, from Instructables - very neat idea!


VERTICAL VEGETABLES

Now to think about suitable plants! Hmm, maybe herbs like coriander and parsley and some Chard, lettuces, strawberries, and more!

Monday, 20 July 2009

A simple shade house


shadehouse
Originally uploaded by margoc
We've had this old roof frame since we moved in - it was at the back of the garage and has stayed there til now with many possible lives it could have lead. Now it has fulfilled its destiny and become the roof of a shadehouse-come-greenhouse.

Simon knocked up a frame for it on the weekend with pieces of timber we had in the garage (it pays to not be too eager to throw things out!).

A bit of shadecloth and gardening plastic should do the trick to cover it. We have some orchids that need a bit of TLC and this will be their home for starters. Also the galangal, lemongrass and other frost-tender things could better survive the winter months under cover.

Why, Clancy could even use it as a playhouse if it doesn't get used for our gardening projects! :o)

Rainwater tank off garage roof


Rainwater tank off garage
Originally uploaded by margoc
We finally put in a rainwater tank last weekend, running off the garage roof. Now, if only it would rain (although I must admit to enjoying the recent warmish winter weather here in Canberra)!

It's just a 500L tank to help with the summer watering and to complement our little greywater set up (which holds about 100L).

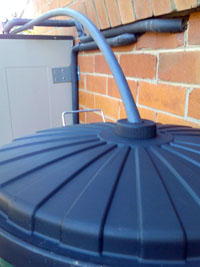
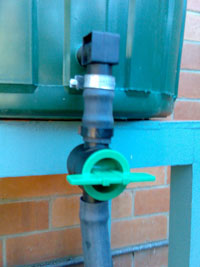
This was a quick 1 day job once we'd bought the fittings, brackets and tank. It's sitting on a wooden pallet. We added a hole to the lid and covered it with a double layer of gutterguard to stop rodents, etc from entering the tank. Not sure if we'll end up with a mozzie problem - something to keep our eye on I suppose. We also put gutterguard along the gutter - of course. :o)

The cost?
500L tank = $99
90mm pipe (x2) = $22
Pipe fittings = $10
Gutterguard (8m) = $3
Brackets = $12
TOTAL = $146

Not bad hey? Off to do a rain dance now :o)

Tuesday, 2 June 2009

Heading into winter: things to do

Can't talk, studying! That's the sound of an M.Ed student in the final throws of study for the Spring semester, as we move into the twilight that is winter. I love winter, I'm a winter baby!

Have one last assessment piece to do for the semester then I'm free! :o)

I also have a growing list of things to do in the garden after I've submitted my essay, and I can't wait:

  1. Pick lemons and preserve them, ala Stephanie Alexander or others style (and noting other's successes/failures)
  2. Read up on caring for blueberry shrubs (especially for winter)
  3. Rake up autumn leaves, twigs, bits, etc and add to compost
  4. Convert makeshift 'piece of tin' into a lid for compost
  5. Install rainwater tank to supplement greywater tank (if it EVER rains that is)
  6. Think of a creative use for the remaining 'brickie's' sand pile (any suggestions folks?)
Side note: We were given a little swing which we've hung under the big pine in our backyard - no end of fun for Clancy!

More after the semester ends! :o)

Sunday, 9 March 2008

Garden layout and design: some revisions

We posted about our garden design back in early October, adding our new garden beds. From recent posts and photos you can see we're well underway getting the backyard into shape!


This second diagram shows the worm farm is no longer under the bay tree - Simon moved it under the patio eaves. The worms are going fabulously, so they must like the change! Also, we've potted a lemon tree into a half wine barrel, which is opposite the path from the passionfruit. It's the Meyer variety, said to do well in Canberra.

The area between beds 3/4 and bed 5 is still up for discussion - we're not sure (apart form moving the clothesline, as per dotted black line) as to what we'll do there. We were thinking of using some decking on the ground in a pattern perhaps, but could also plant or add another small bed. Currently it's a combination of (slightly pathetic) grass to the right and gravel on the left. There's paving at the base of the diagram too. We had planned to have no grass, but with recent rains the little patch has come back. We have even contemplated fake turf!

Still, we're looking at an overall "landscaped" (loosely speaking) solution to really turn the space into a user-friendly area. Any ideas welcome!

Sunday, 28 October 2007

Building a garden pond

We've finally finished our pond. It was a bit of work, but we reckon it's worth it, as it now gives the garden a different look and feel (even more so when we actually top it up with water!).

We've been looking into getting some native pond plants and ways to attract frogs too.

First, you must create the ideal habitat for frogs. From the slideshow here of our pond-making efforts, you can see the pond's location. It's in part shade and is shaded from the afternoon sun by the house (which is great in summer and hopefully will lessen the loss of water through evaporation), and using plants and the established trees we hope the microclimate will be conducive for frogs!

What's a microclimate? Basically, it's an area which exhibits a highly localised climate that is different to the general climate of an area. It can be as small as a few feet or as large as a few acres. We're hoping our pond will help to keep the area surrounding it cooler and more humid than areas further away. We've got a jasmine climbing on a frame nearby, a range of native plants, including lilies (a native pale vanilla lily), grasses and native violets; plus, some orchids, daphne, grevillea, and japanese maples. With the side of the house (brick) together with the lattice fence, the area is contained and protected from wind. The eaves also help protect plants from winter frosts. When creating microclimates it's good to think about

  • temperature control
  • patterns of light and shade
  • humidity
  • airflow
...as Carol from garden guides has.

What about maintaining your pond? We had a look at the ACT govt legislation website for details relating to ponds and water restrictions. Here's a snippet from the table of info they provide on the site (from left to right, staged restrictions apply up to level 5. We are currently on level 3 water restrictions):

  1. Private Ponds and Garden
    Fountains
Fountains to be switched Off unless they re-cycle water.

Ponds may be topped up by hand held hose or bucket

Fountains to be switched Off

Ponds may be topped up by hand held hose or bucket

Ponds that support fish or birds may be topped up by bucket directly filled from a tap but not a hose Ponds that support fish or birds may be topped up by bucket directly filled from a tap but not a hose Ponds that support fish or birds may be topped up by bucket directly filled from a tap but not a hose
Source: WATER RESTRICTION SCHEME APPROVAL 2002 - Utilities (Water Restrictions) Regulations 2002: Part 2, s 5: Approved water restriction scheme.

Sydney Water also have some tips on garden design for optimum water-saving, including the use of microclimates.

Additionally, installing a rainwater tank would mean you can top your pond up with rainwater rather than mains water. We're researching water tanks at present to see what will work in our location, to achieve optimum rain capturing and usage!

We'll post more on that later. For now, we're going tadpoling!

Sunday, 21 October 2007

Books: Australian Plants for Canberra Region

While spending up big at the Botanic Gardens plant sale yesterday, we also purchased this book:

Australian Plants for Canberra Region Gardens and other Cool Climate Areas (ISBN 0 909830 59 2).
It's an informative book covering a broad range of grasses, shrubs, trees and more that grow well in Canberra's harsh conditions. It's published by Australian Native Plants Society Canberra Region Inc. (formerly the Society for Growing Australian Plants, Canberra Region Inc.) who describe the book on their website:
The purpose of this book is to assist people growing Australian plants whether they are starting a new garden, developing an established one, or just adding some native plants to any garden. It features over 10,000 Australian plants suitable for growing in the Canberra Region, and much of the information gathered here will have application elsewhere in temperate southern and eastern Australia. Many of the plants that grow successfully in Canberra's climatic extremes have a wide range of adaptability.
Well worth the $20 we think! A great addition to your book collection if you're aiming for a native garden in the Canberra region.

New plantings and diggings


Its that time of the year again and the Australian Botanic Garden Society had their biannual native seedling sale. We picked up a few seedlings at last year's Spring sale and a few more at the Autumn sale. We went a bit crazy on Saturday and stocked up on some hedging shrubs for the new bed along the side fence - some hovea longifolia, pomaderris betulina (subsp. actensis), leionema elatius, accacia - we wanted some all year colour that would provide a bit of additional screening for our backyard and a local bottlebrush with yellow flowers (callistemon pityoides) .

We picked up some more native grasses and some flowering rockery plants to plant in our rockery overlooking the pond. Once we got home we realised we would now need a rockery to plant them in, so we did some granite relocation and built up a raised bed with the spare soil we had dug up in making our pond. Before we got stuck into the rockery, we put the lining in our pond and lay a small path to the pond and made our first use of the load of brickies' sand we had delivered with our sleepers.

On the way back from the Botanic Gardens we stopped at Yaralumna Nursery, where we added some Honey Myrtle, which is a swamp tree with mauve flowers and likes wet feet and clayey soil. Perfect for the damp spot near the side gate and is in the shade for most of winter. We also picked up another accacia for the side fence bed and a big kangaroo paw for our 'grassy knoll'.


Our mate from tai chi, Rob, also gave us some grasses which we have put with our new kangaroo paw and will use to replace the weedy, festery, straggly lawn we have on our verge. I have slowly been digging this up from our front yard and turning it in to the soil so that there is almost none left save for a strip along the side footpath. These last remnants are getting the chop this weekend, as I turn it over to, mulch the surface and put in Robbie's native grasses.

Saturday, 13 October 2007

Garden layout and design: new moves

I mentioned earlier that we were planning out our garden beds, and have also bought some sleepers to set these up further. This image below shows how the beds were first off:

Our first effort was a basic tidy-up. This second image shows some changes we're working on:


Some slight differences. First we have cut out the Oleander (bottom left corner shrub) in favour of more productive, less toxic choices. Second, we have a second passionfruit, a Nelly Kelly, (to the right) planted to replace the aging one (to the left of the existing one). We've been wheeling in extra soil and mulch to start to build up bed #5, the new one to the right of the path (red dotted lines). This will be in full sun, so sun-hungry plants will go there, along with a couple of citrus trees (in half wine barrels). Oh, and the black dotted line is the clothesline's new home too. :o)

With this 5th bed, we hope to have more garden space for vege production and won't have to worry about mowing the little grassy patch anymore!

Sunday, 5 August 2007

Curing olives

A colleague of Simon's had picked a heap of olives (from some trees that are over 70 years old), then had no time to cure them, so we took up the challenge to do so!

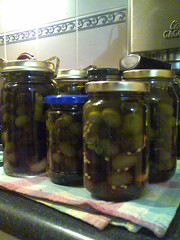
We had two recipes to try. I had tried curing olives a few years ago when we were still living in WA. I used a curing recipe from Stephanie Alexander's Cook's Companion (1st edition, p.631 if you have a copy). It worked OK, and used less salt than the one we recently tried, which is by Andrew Cope (who I think is linked to the Richmond Hill Cafe and Larder). It goes something like this:

  1. dissolve 1 cup salt in 3 litres of water in a large jar or bucket (not steel or aluminium)
  2. slit each olive lengthways to the stone and toss into the salted water
  3. replace the salt liquid everyday for 1 week, then once a week for the next 3 weeks, or until the bitter taste of the olives is gone
  4. sterilise some jars (with a good seal)...then this is where we changed the recipe...
  5. you can either store the olives in a salt wter brine with a layer of olive oil on top
  6. if you want to use the brine: mix 1/2 cup salt with 3 litres water, bring to the boil then cool before using...
  7. otherwise, we used a 50-50 mix of red wine vinegar (good quality) and an extra virgin olive oil with a mix of herbs and spices, such a lemongrass, chilli, coriander seeds, bay leaves, garlic gloves, oregano (dried/fresh) and thyme. Mix to your preference.
  8. We then let the olives sit for about 6 weeks before trying them.

A couple of 'learnings'...

We started with a mix of green and black olives. Black olives are simply ripened green olives and have a softer form. On reflection we would separate the olives which means the black ones wouldn't need as long to cure (they can become quite mushy otherwise).

Also, we probably didn't use the best olive oil for the jars and come tasting time, it really showed. The olives themselves were divine, and the red wine vinegar worked a treat, but the olive oil we used let the team down!

A work colleague asked me, 'aren't you worried about the amount of water used?' The answer is yes. What could be done with the salty water, other than throw it away? We could revert back to Stephanie's recipe were the salt is not introduced to the curing process until close to bottling, then you can re-use the water on your garden for example.

Anyway, we're always learning! here are some other curing webpages that might be of interest if you want to give olive curing a go yourself.

http://www.oliveoilsource.com/olive_recipes_.htm

http://www.wikihow.com/Cure-Olives (good alternatives if you're concerned about disposing of salt water)

And, if you've had success with curing olives, we'd love to hear from you!

Sunday, 24 June 2007

Setting up a grey water system on the cheap

Post note: After using this system for about a month now, we realised we hadn't added a lint catcher of filter, so have stretched a piece of flywire across the top, held on with the lid. Simon also drilled out the small filter on the tap itself, which allows for greater flow-through of water.

Canberra is switching to stage 4 water restrictions sometime in July/August, which means NO outdoor watering (i.e. using potable water). ActewAGL also have a waste water treatment program to help manage our decreasing potable water levels.

We love our garden, like many other Canberrans, and while we generally use our washing (grey) water, sometimes when we wash we don't need to water the garden then and there (particularly now in the winter months). According to ACT Health, an average household can generate up to 528 litres of grey water everyday - crikey! Makes you want to reuse it, just to make it really worth it! :o) So, reusing our washing water (approx 120 litres a wash) is a pretty good start!

So today, we put together a cheap grey water system, made up of a 75 litre garbage bin (we have a small-ish washer), with a clip-on lid, outlet, garden tap and 13mm hose. We didn't want to spend up big on a complete system (being fairly recent home owners and all!), and wanted something that could collect washing water, yet allow us to water at another time as the garden needed it. We have an existing hose running from the machine out to the garden which we move about to soak plants.

The system goes together like this:

1. The hose runs from the washing machine outlet hose to the top of the "tank" (75 litre garbage bin).


2. A hole in the top (i.e. bin lid) allows any air to escape as the "tank" fills. The hose is set at top of the "tank", to avoid any siphon-effect, so that water does not get sucked back into the machine.


3. An outlet with a tap is fitted at the base of the "tank", to allow water to be used (via a gravity-feed method) when required. This will hopefully take the pressure of the washing machine pump too (fingers crossed).
**Note: ACT Health guidelines on using grey water strongly recommend you dispose of unused grey water after 24 hours via your sewage system - you need approval to store grey water any longer than 24 hours (it's a good read actually, states how to set up and manage your grey water use and explains the affects possible of grey water on your garden too).

We have set the system up just above our sewage drain outlet and can run unused water directly into the sewage system when necessary.


4. To use the grey water, we can either attach a hose that runs out into the garden, or use a watering can, depending on what requires a little watery lovin'! The good thing is that the system is pretty much a closed one, making it relatively safe (in terms of storing it at least).

Here's a quick slideshow of the parts that came together to make our cheap grey water system.

When I say the system is "cheap", the whole lot cost less than $A40. We had existing hose (about 15 metres or so) and used some silicon to seal the outlet at the base of the bin. All parts were found from our local hardware store too. It took less than an hour to set up the system itself and we will allow 48 hours for the silicon to set (especially so it doesn't contaminate the water and thus our lovely vegies and plants!). We could get a bigger bin, but given the time limit on storing grey water, it's likely 75 litres would suffice.

Eventually, we would love to have a fully integrated grey water system, where we could reuse the water for flushing toilets, as well as for watering the garden. This, combined with a rain water tank, would really reduce our water usage!

We'd love to hear how you're coping with water shortages and restrictions - what projects have you done to conserve water in your home? What do you think of our "cheap" grey water system?

Tuesday, 8 May 2007

Garden layout and design: getting started

Since reading Companion Planting, we've been re-thinking the layout of our garden and how best to use the small space we have, and how to make the most of Canberra's four seasons, beginning with Autumn!

Below is the current layout of our backyard where we have planted vegies along with managing the existing shrubs and trees.


The northerly aspect provides a good deal of heat and light to bed #1, which backs up against the northern garage wall. We have red onion seedlings here (about 2 weeks in now). The opposite bed, #2 sits along our neighbour's fence and receives some late sun and is partially shaded by the fence for much of the day. Here we have spuds, garlic, broccolli, caulflower, silverbeet (all about 2 weeks old), and herbs (oregano, french tarragon, sage, crawling thyme), which sit under the bay tree (which sits in the northeast corner of the backyard).

In the northwest corner on the back fence sits our compost pile.

Beds #3 and #4 are pretty much the same bed, but we've separated them because bed #3 has more established plants like galangal, lemongrass, chillies (jalepeno and habanero), and a cherry capsicum.

Bed #4 sits under the shade of a huge native pine (the name of which escapes me right now) and has not had much use it seems, as the soil there is dry and water resistant. We've been building this bed up with pea straw, compost, worm castings, fish & seaweed emulsion, and mulch from other areas of our garden. We have planted some broad beans there (about 10 days ago), sowing them directly into the ground.

We weren't too sure what would work under the pine (southwest side of the backyard), so we'll see how the broad beans go. Even is they don't do too well, they should fix some nitrogen back into the soil! Beds #3 and #4 get late sun, before being shaded again later as the sun sets. these beds sit alongside our fenceline on the street-side of the block (southside).

We may try a 3-4 year planting cycle, so that the future crop benefits from the previous crop in what it leaves in the soil.

Next: ideas on companion plants for a 3-4 year planting cycle!